Credentials
Follow the specific cloud and preferred method to create the necessary credentials below:
AWS
One Click Role
How Massdriver uses your role
To keep your environment secure, Massdriver uses a role with a trust policy to access your AWS account for provisioning and monitoring of your infrastructure. The account that assumes this role is private and has no access from the public internet.
Click the quick add button
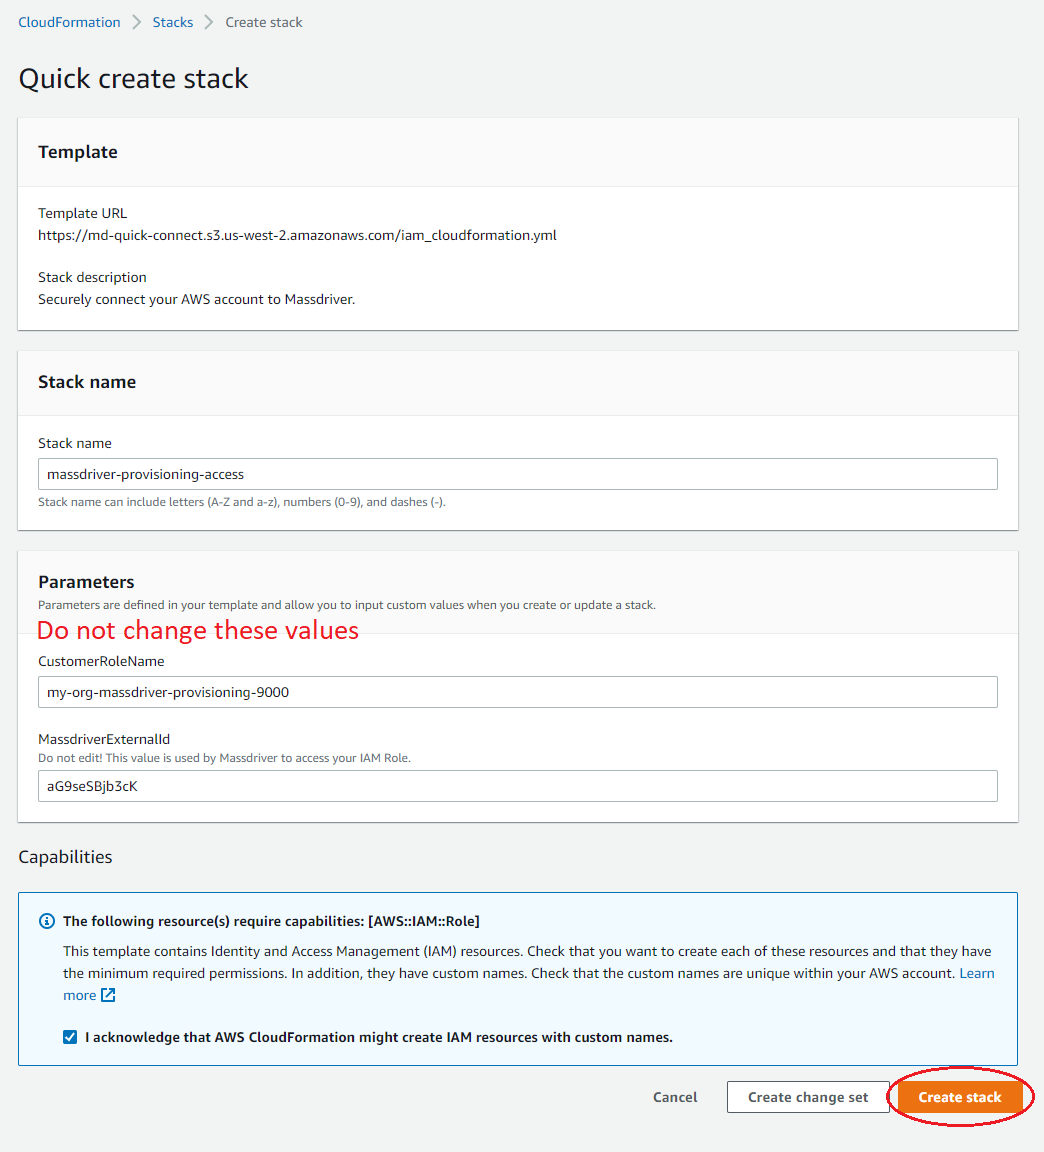
Click here to run a hosted CloudFormation stack on AWS which will create a new role in your account with the permissions required to provision infrastructure in Massdriver. The external ID for the role (required to prevent confused deputy attacks) will be unique and auto-generated in the URL for the CloudFormation stack. Do not change this value in the URL.
Run the CloudFormation stack
Once you are in your AWS console, review the resource creation. Click the Create stack button to provision the role.
Copy the role ARN to Massdriver
Once the CloudFormation stack has completed its task, select the outputs tab and copy the value of the CustomProvisioningRoleArn output. Paste the value into the AWS ARN field in the credentials creation form.

Add to the Credential Name field. Click Create to add the credential to Massdriver and head to the projects page to start building your infrastructure.
CLI
How Massdriver uses your role
To keep your environment secure, Massdriver uses a role with a trust policy to access your AWS account for provisioning and monitoring of your infrastructure. The account that assumes this role is private and has no access from the public internet.
Create a role with a trust policy
Run the following command with the AWS CLI to create an IAM Role with a trust policy (the external ID is unique and auto-generated):
aws iam create-role --role-name= --description="Massdriver Cloud Provisioning Role" --assume-role-policy-document='{"Version":"2012-10-17","Statement":[{"Sid":"MassdriverCloudProvisioner","Effect":"Allow","Principal":{"AWS":["308878630280"]},"Action":"sts:AssumeRole","Condition":{"StringEquals":{ "sts:ExternalId":""}}}]}'
Assign the role administrator privileges
Run this command to give Massdriver administrator privileges:
aws iam attach-role-policy --role-name= --policy-arn=arn:aws:iam::aws:policy/AdministratorAccessImport role to Massdriver
Insert in the Credential Name field. Then set AWS ARN as arn:aws:iam::YOUR_AWS_ACCOUNT_ID:role/ and Loading... as the External ID. Click Create and head to the projects page to start building your infrastructure.
Console
How Massdriver uses your role
To keep your environment secure, Massdriver uses a role with a trust policy to access your AWS account for provisioning and monitoring of your infrastructure. The account that assumes this role is private and has no access from the public internet.
Create a role
- Sign in to the AWS Management Console
- In the search bar, type
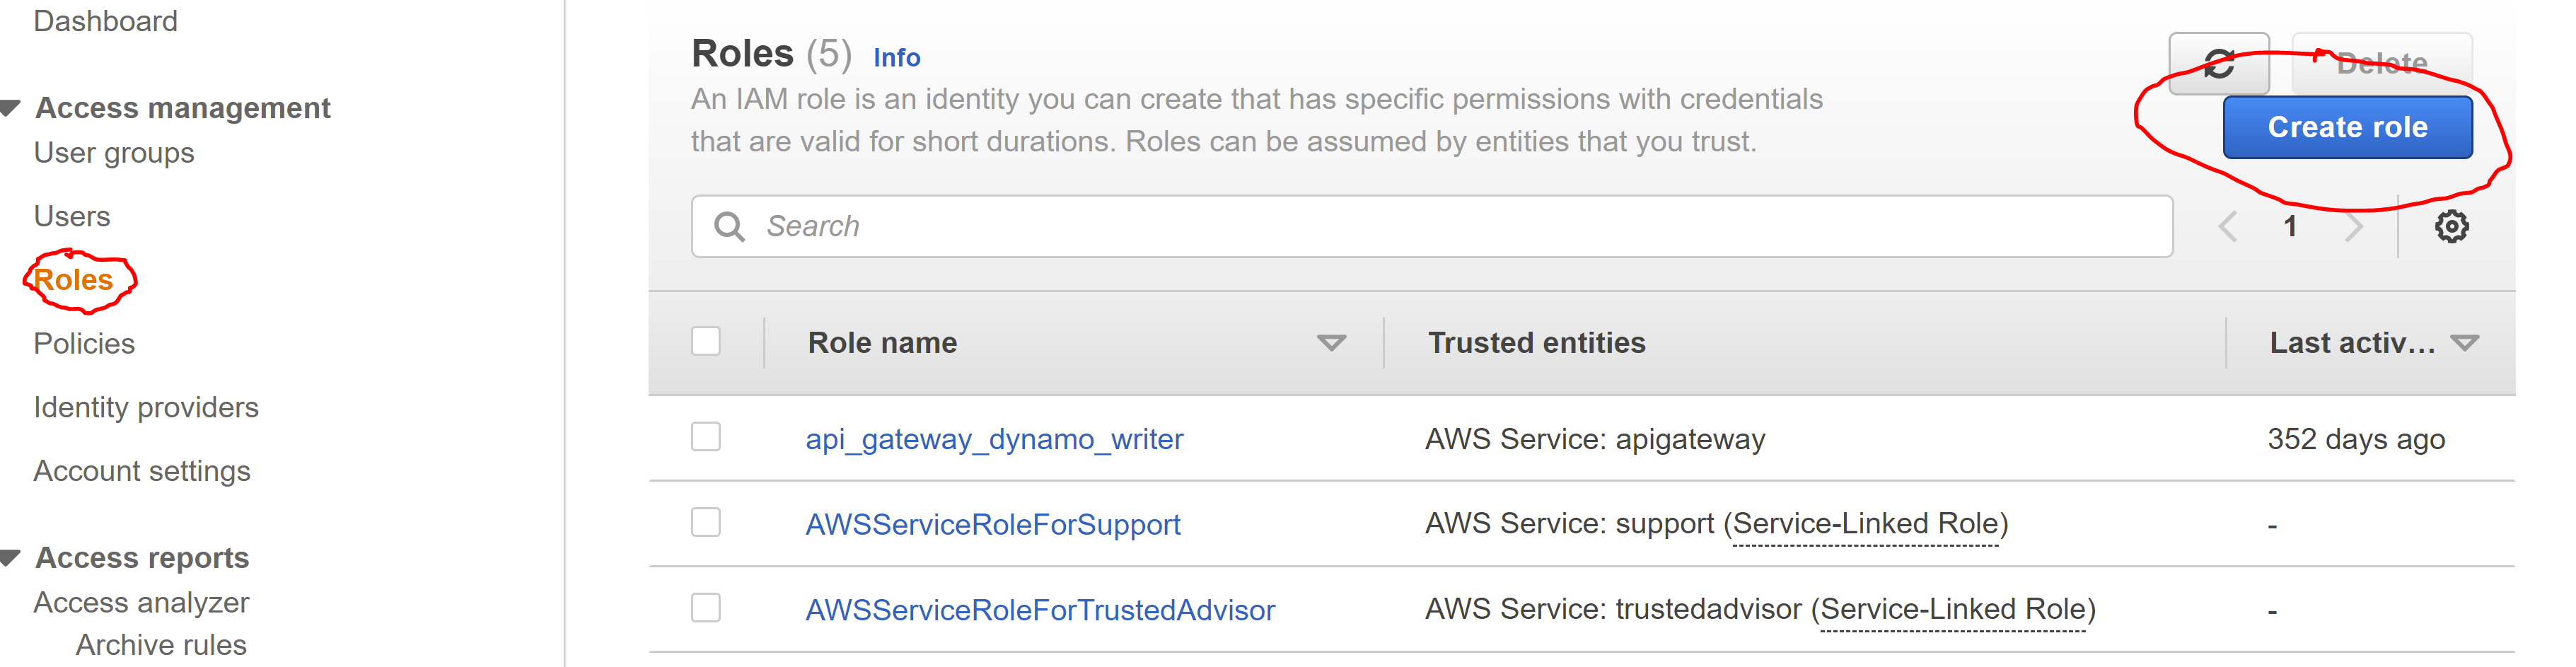
IAMand select the IAM service - In the left-hand menu, select
Roles - Click
Create role
- Select
Another AWS accountfor the role type

- For the account ID enter 308878630280. This is the Massdriver account which contains the role that will use the one you are creating now
- Check the Require external ID box and enter Loading....
- Make sure that the
Require MFAoption is unchecked
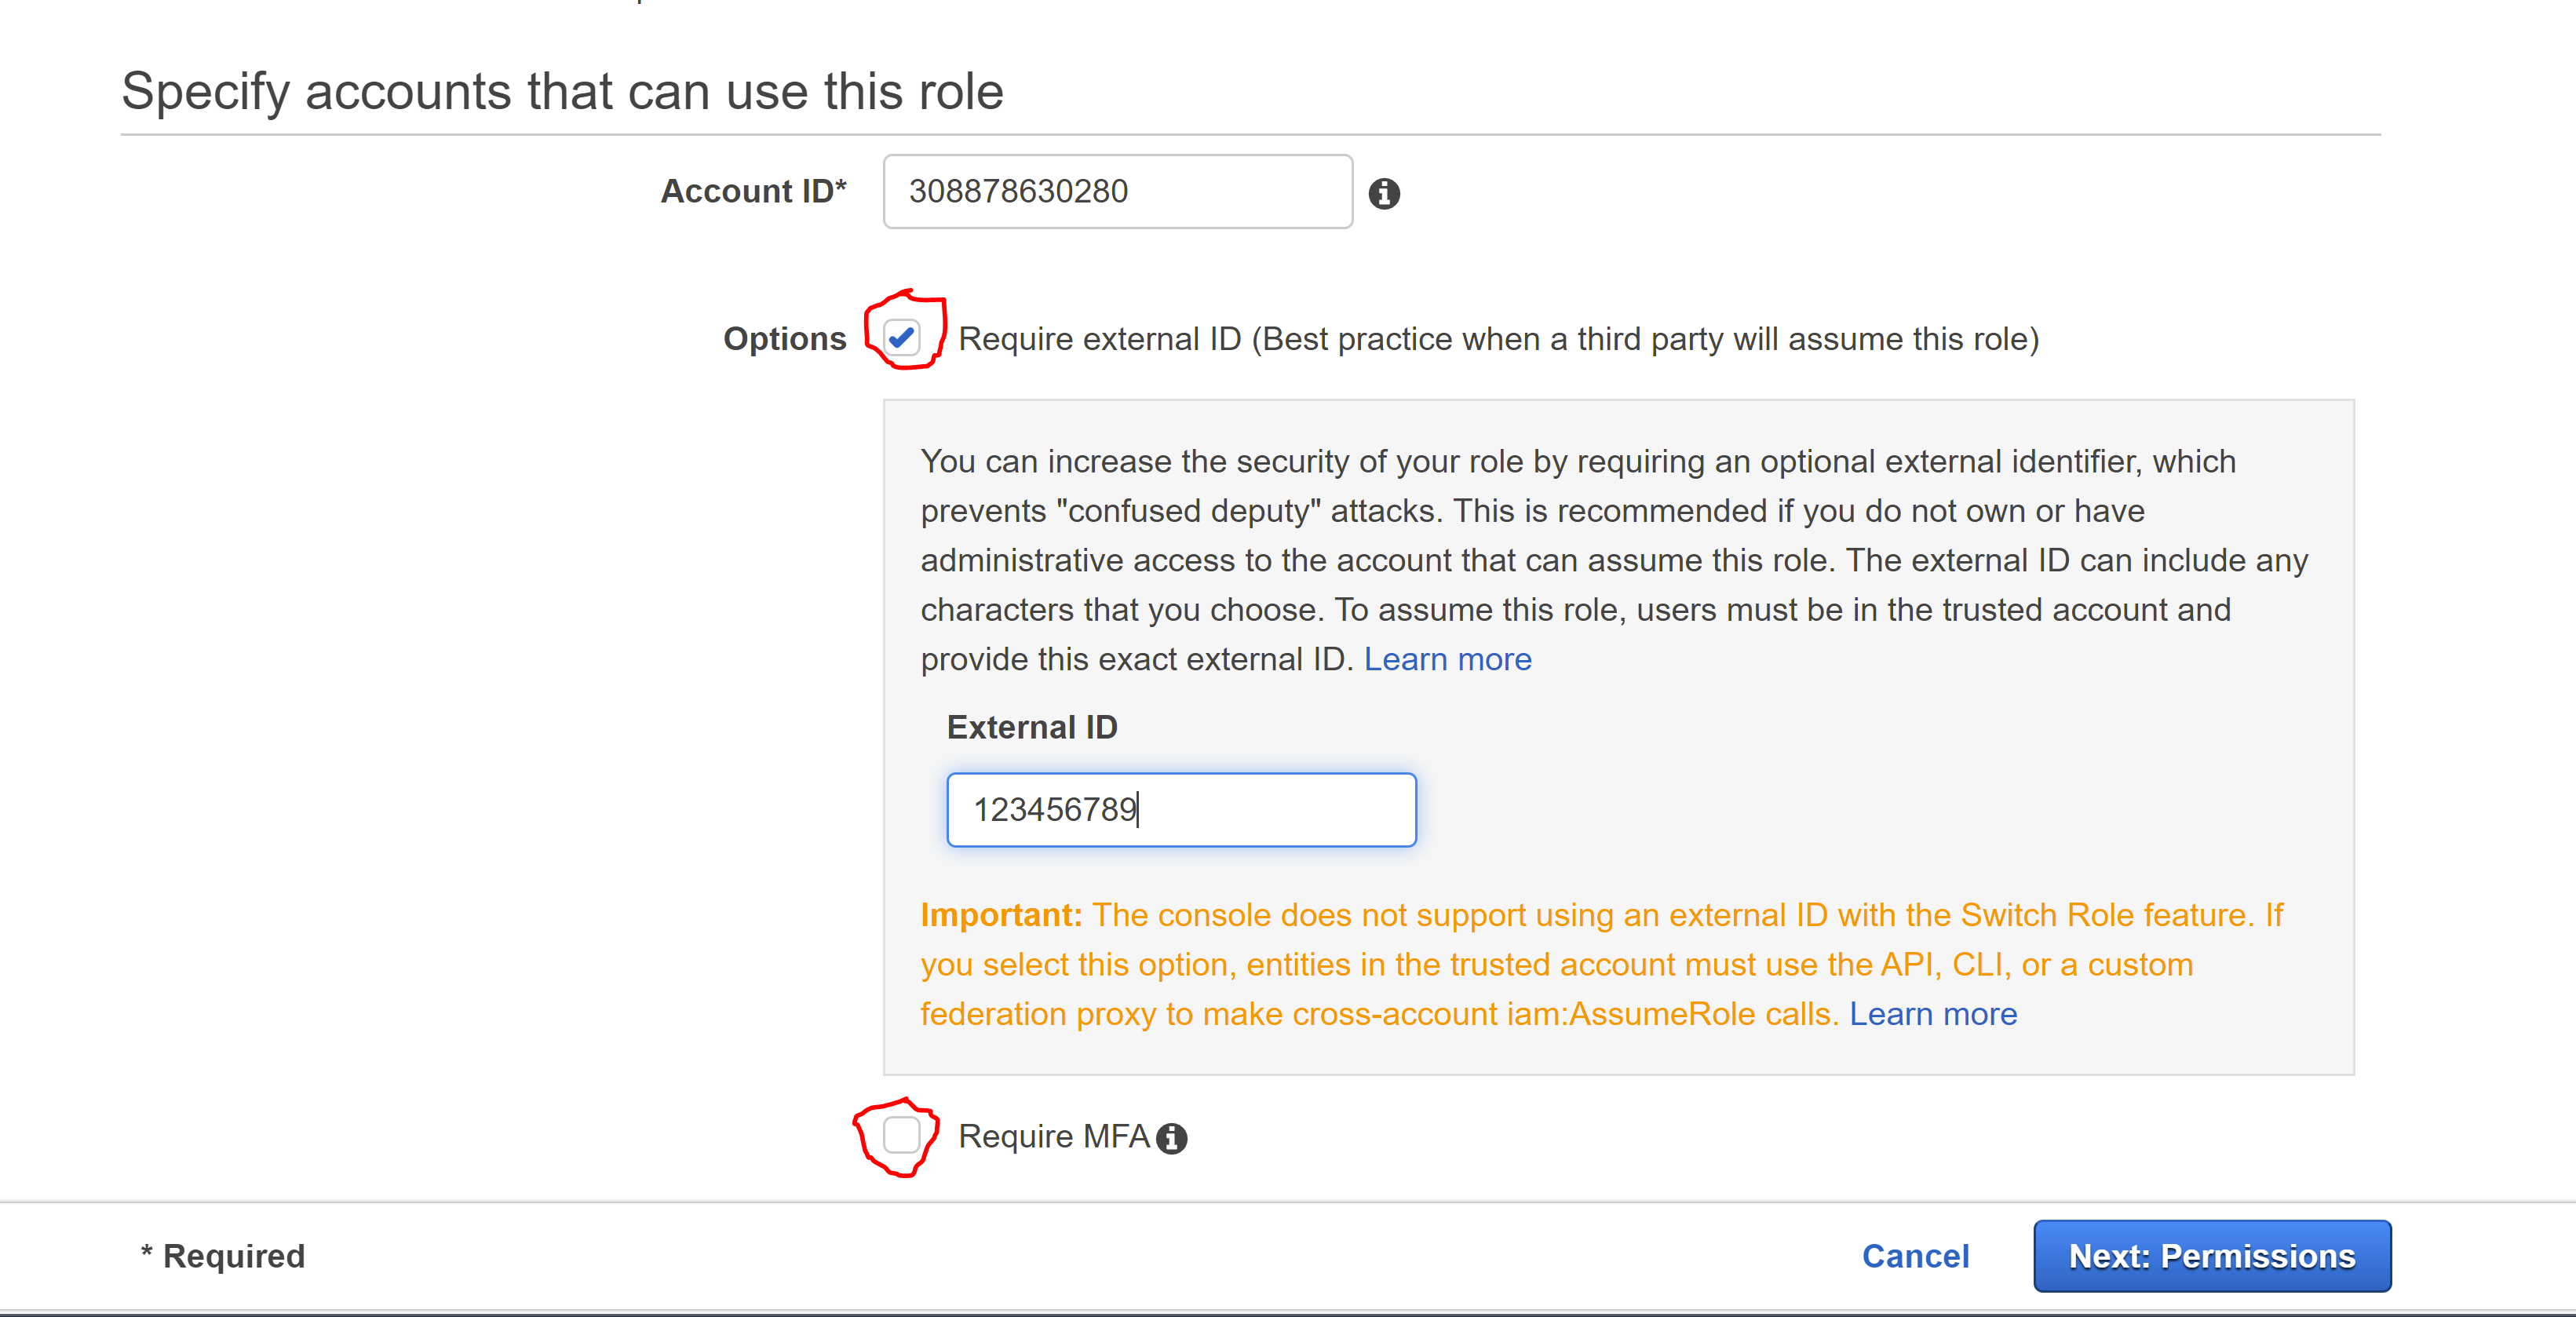
- Click
Next: Permissions - Select the
AdministratorAccesspolicy

- Select
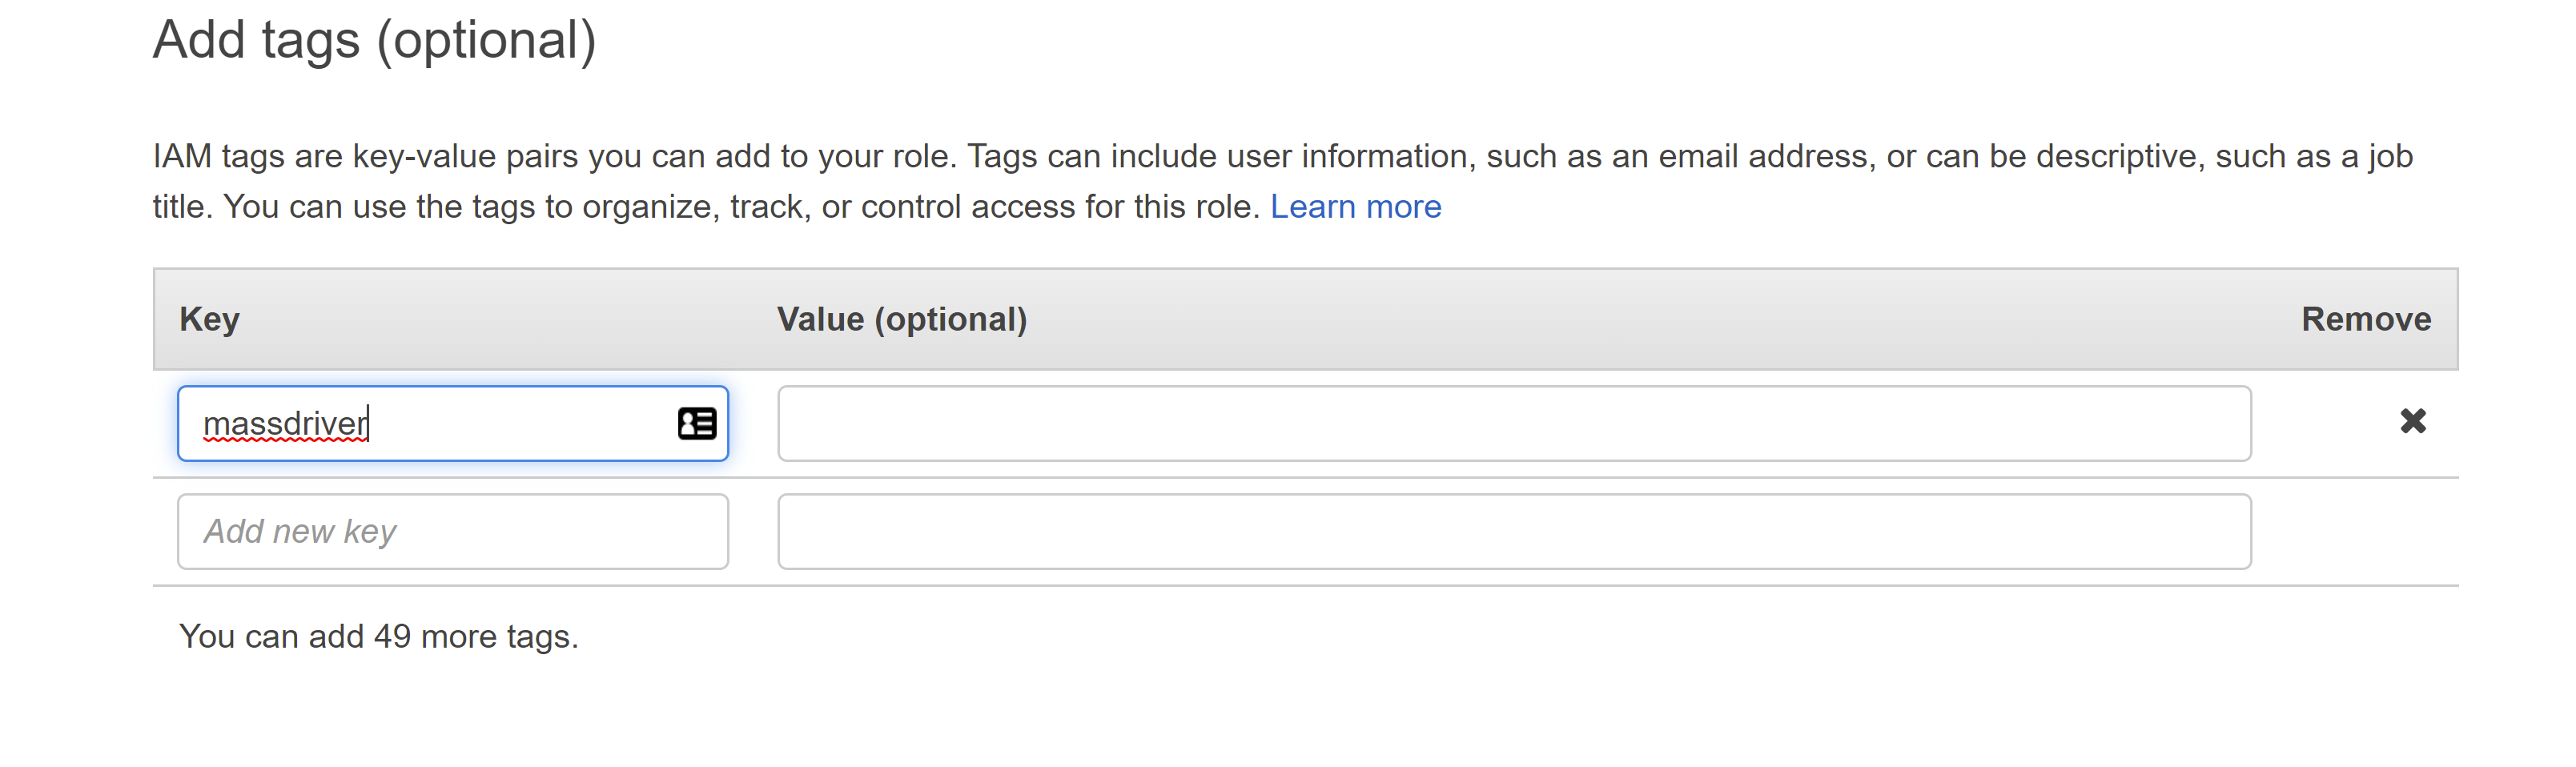
Next: Tags - Add a tag with the key
massdriver
- Set
Role nameto and add a description to the role
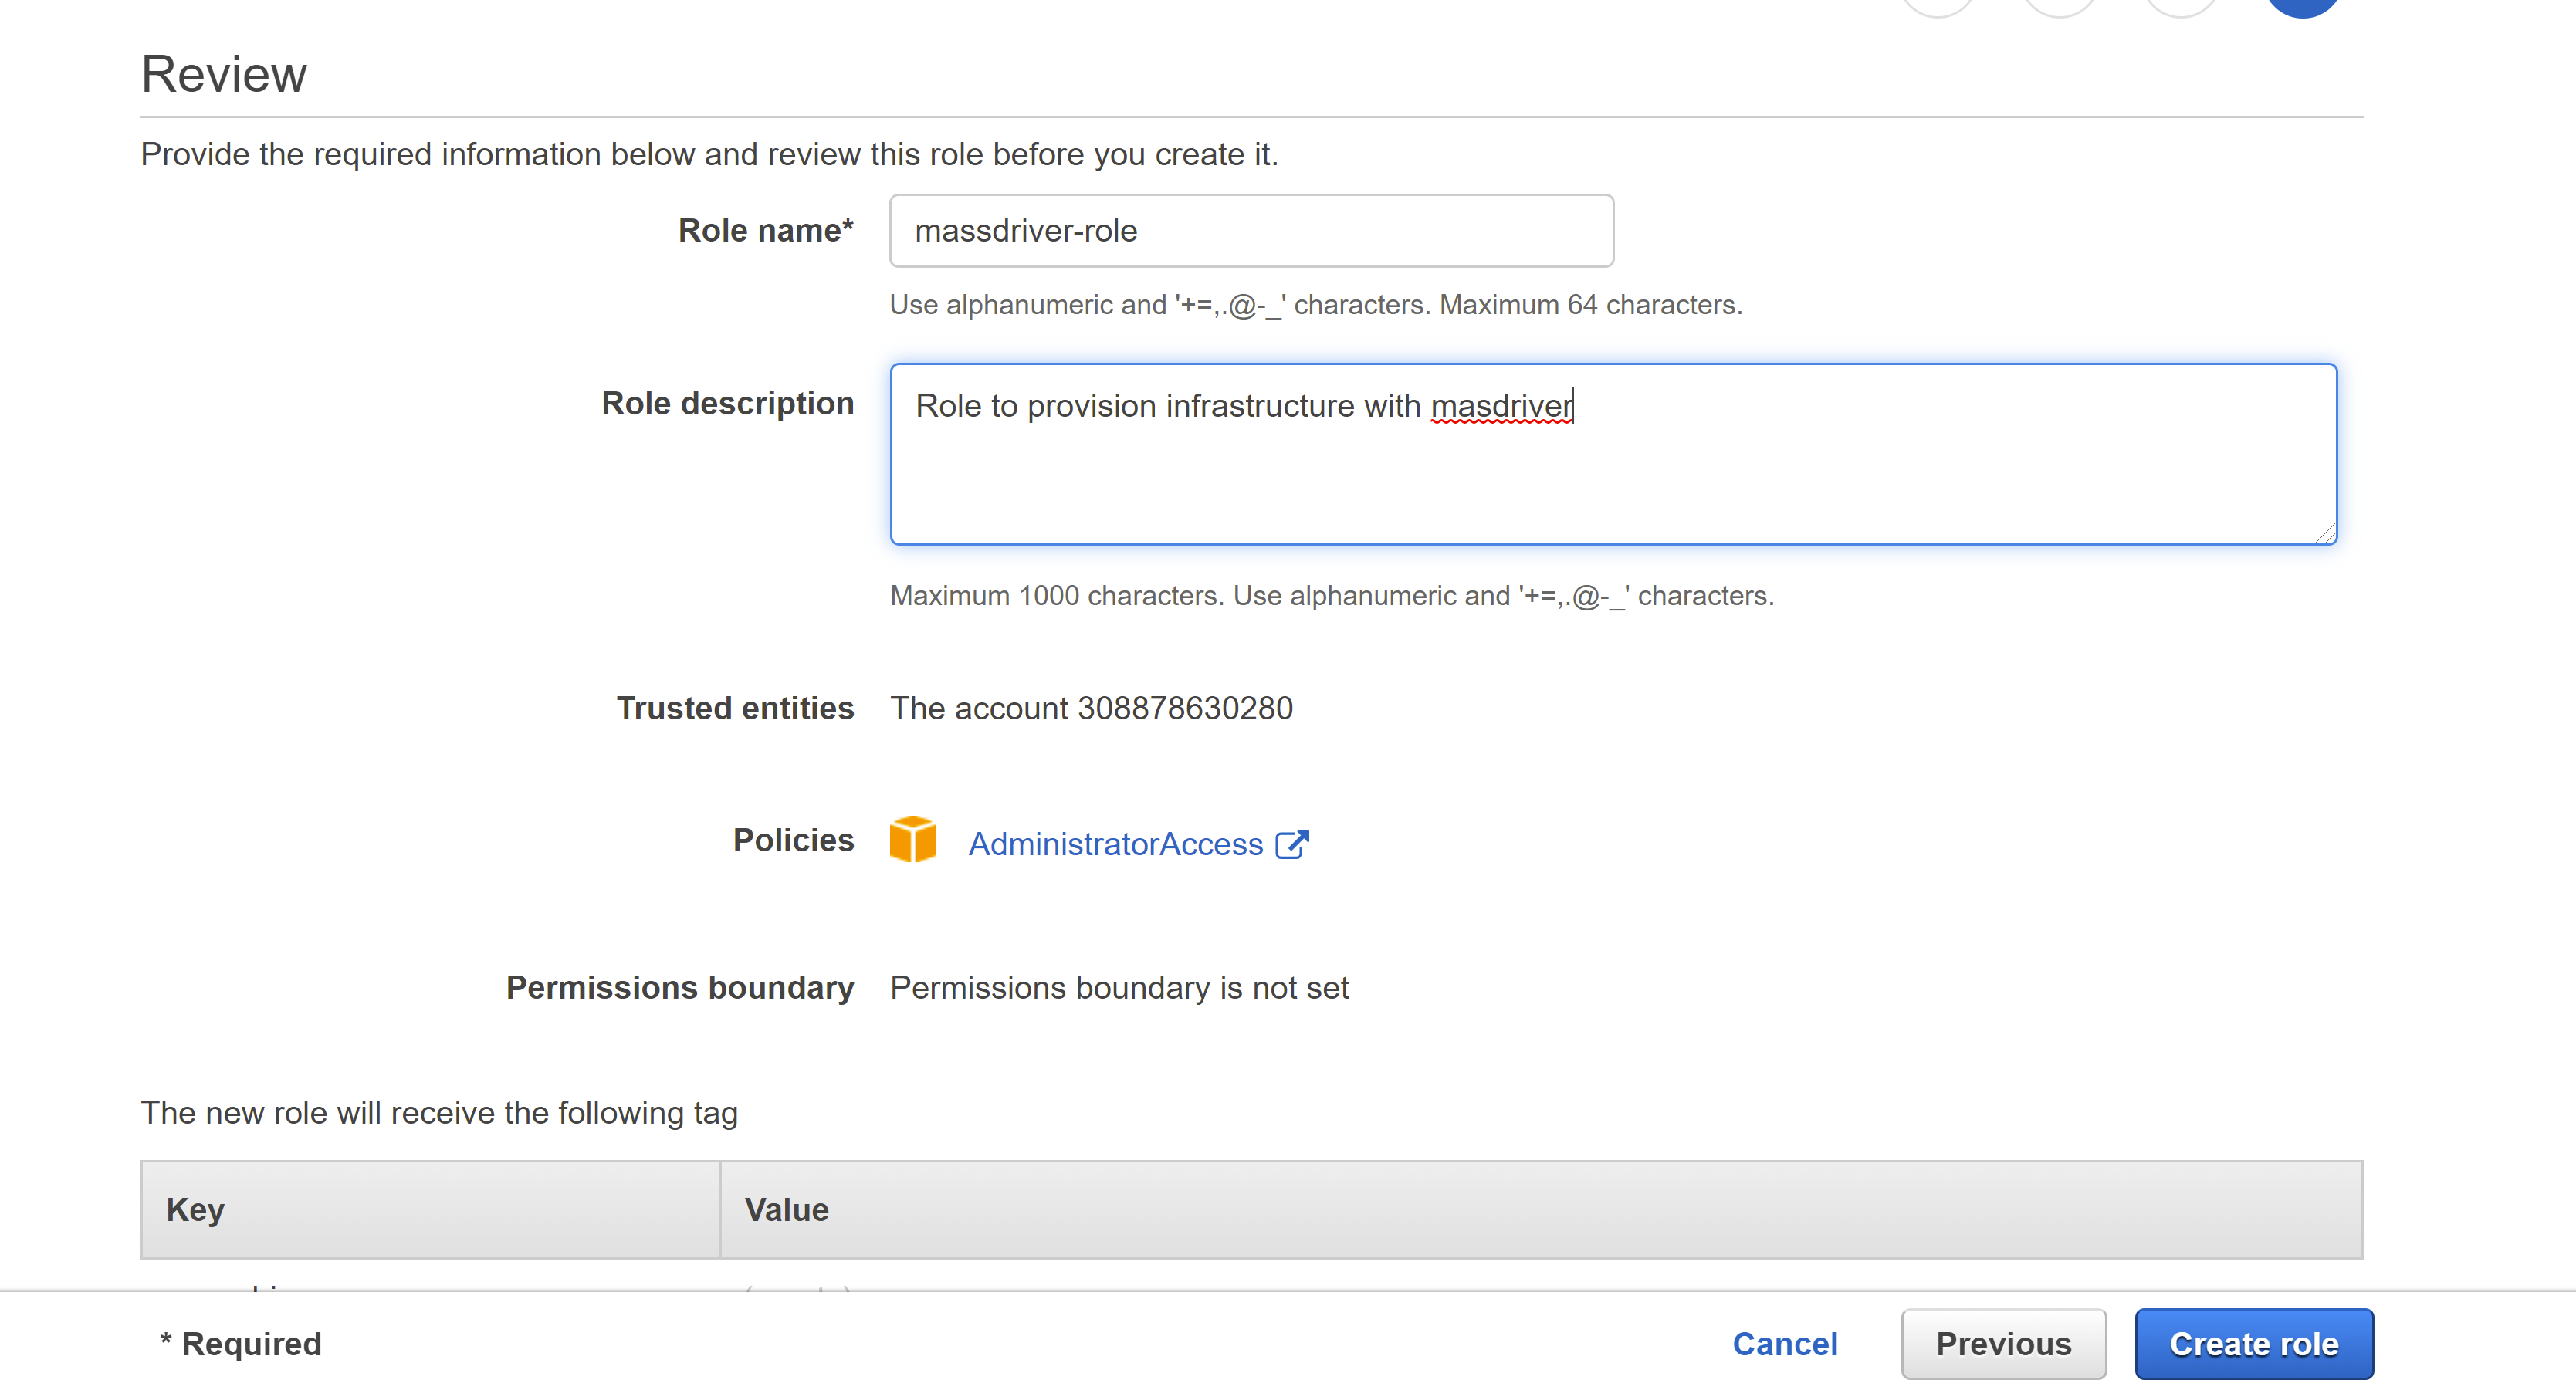
Set
Credential NametoPaste the AWS ARN for the role in the
AWS ARNfield: arn:aws:iam::YOUR_AWS_ACCOUNT_ID:role/Paste Loading... in to the
External IDfieldClick
Createto add the credential to Massdriver and head to the projects page to start building your infrastructure.
Azure
CLI
Install Azure CLI
To get started, you'll need the Azure CLI installed locally on your machine. The Azure Cloud Shell available in the Azure Portal does not have the ability to grant the service principal the required permissions.
- Obtain your subscription ID
Paste this script into the command-line to list your subscriptions:
az account list --output table
- Paste this script in the command-line to create an Azure service principal:
az ad sp create-for-rbac --name --role contributor --scopes /subscriptions/- Copy the outputs and paste them into Massdriver:
- → Credential Name
- appId → Client ID
- password → Client Secret
- → SubscriptionId
- tenant → Tenant ID
Once finished, click the Create button in Massdriver to create your credential.
Console
Registering the service principal app in Azure AD
- Sign into your Azure account through the Azure portal
- Search for and select
Microsoft Entra ID - Select
App registration - Select
New registration

- Name your application:
- Select
Accounts in this organization directory only - Leave
Redirect URIblank

- Click
Register - In the
Overviewmenu, copy theApplication (client) ID - Paste your Azure client ID here:
- Copy the
Directory (tenant) ID - Paste your Azure tenant ID here:

- Select
Certificates & secretson the left - Select
New client secret - Set the description to
platform, set expiration date, and clickAdd

- Copy the
Valuepassword. Do not use the Secret ID - Paste your Azure client secret value here:

Assign subscription Owner the service principal
- In the Azure portal, search for and select
Subscription - Select the subscription you want to use in Massdriver
- In the Overview menu, copy your
Subscription ID - Paste your Azure subscription ID here:
- Select
Access control (IAM) - Select
Add>Add role assignment - Select
Privileged Administrator Rolestab and then theOwnerrole and clickNext - Select
Select members, search for , click on the service principal, and then clickSelectat the bottom, thenNext - Select
Allow user to assign all roles except privileged administrator rolesand clickNextthenReview + assigntwice to finish.
Adding the Azure service principal to your Massdriver organization
- In Massdriver, click on the menu on the top left and expand Organization Settings
- Click
Configure Credentials - Select
Azure Service Principal - Fill in the fields as guided below:
- Credential Name ()
- Client ID ()
- Client Secret ()
- Subscription ID ()
- Tenant ID ()
Click Create to add the credential to Massdriver and head to the projects page to start building your infrastructure.
GCP
CLI
Create the service account
Using GCloud CLI, paste the following command in a terminal to create a service account for Massdriver to use:
gcloud iam service-accounts create --description="Massdriver Service Account" --display-name=Assign the service account the owner role
Paste the following command to assign the service account the owner role:
gcloud projects add-iam-policy-binding --member=serviceAccount:@.iam.gserviceaccount.com --role=roles/ownerCreate a service account key
Massdriver needs a service account key to access the GCP API. To create one paste the following command into a terminal:
gcloud iam service-accounts keys create md--key.json --iam-account=@.iam.gserviceaccount.comAttach the .json file created in the above command in to the Artifact Data field on the form.
Set the Credential Name to and click Create to add the credential to Massdriver. Head to the projects page to start building your infrastructure.
Console
Create a service account
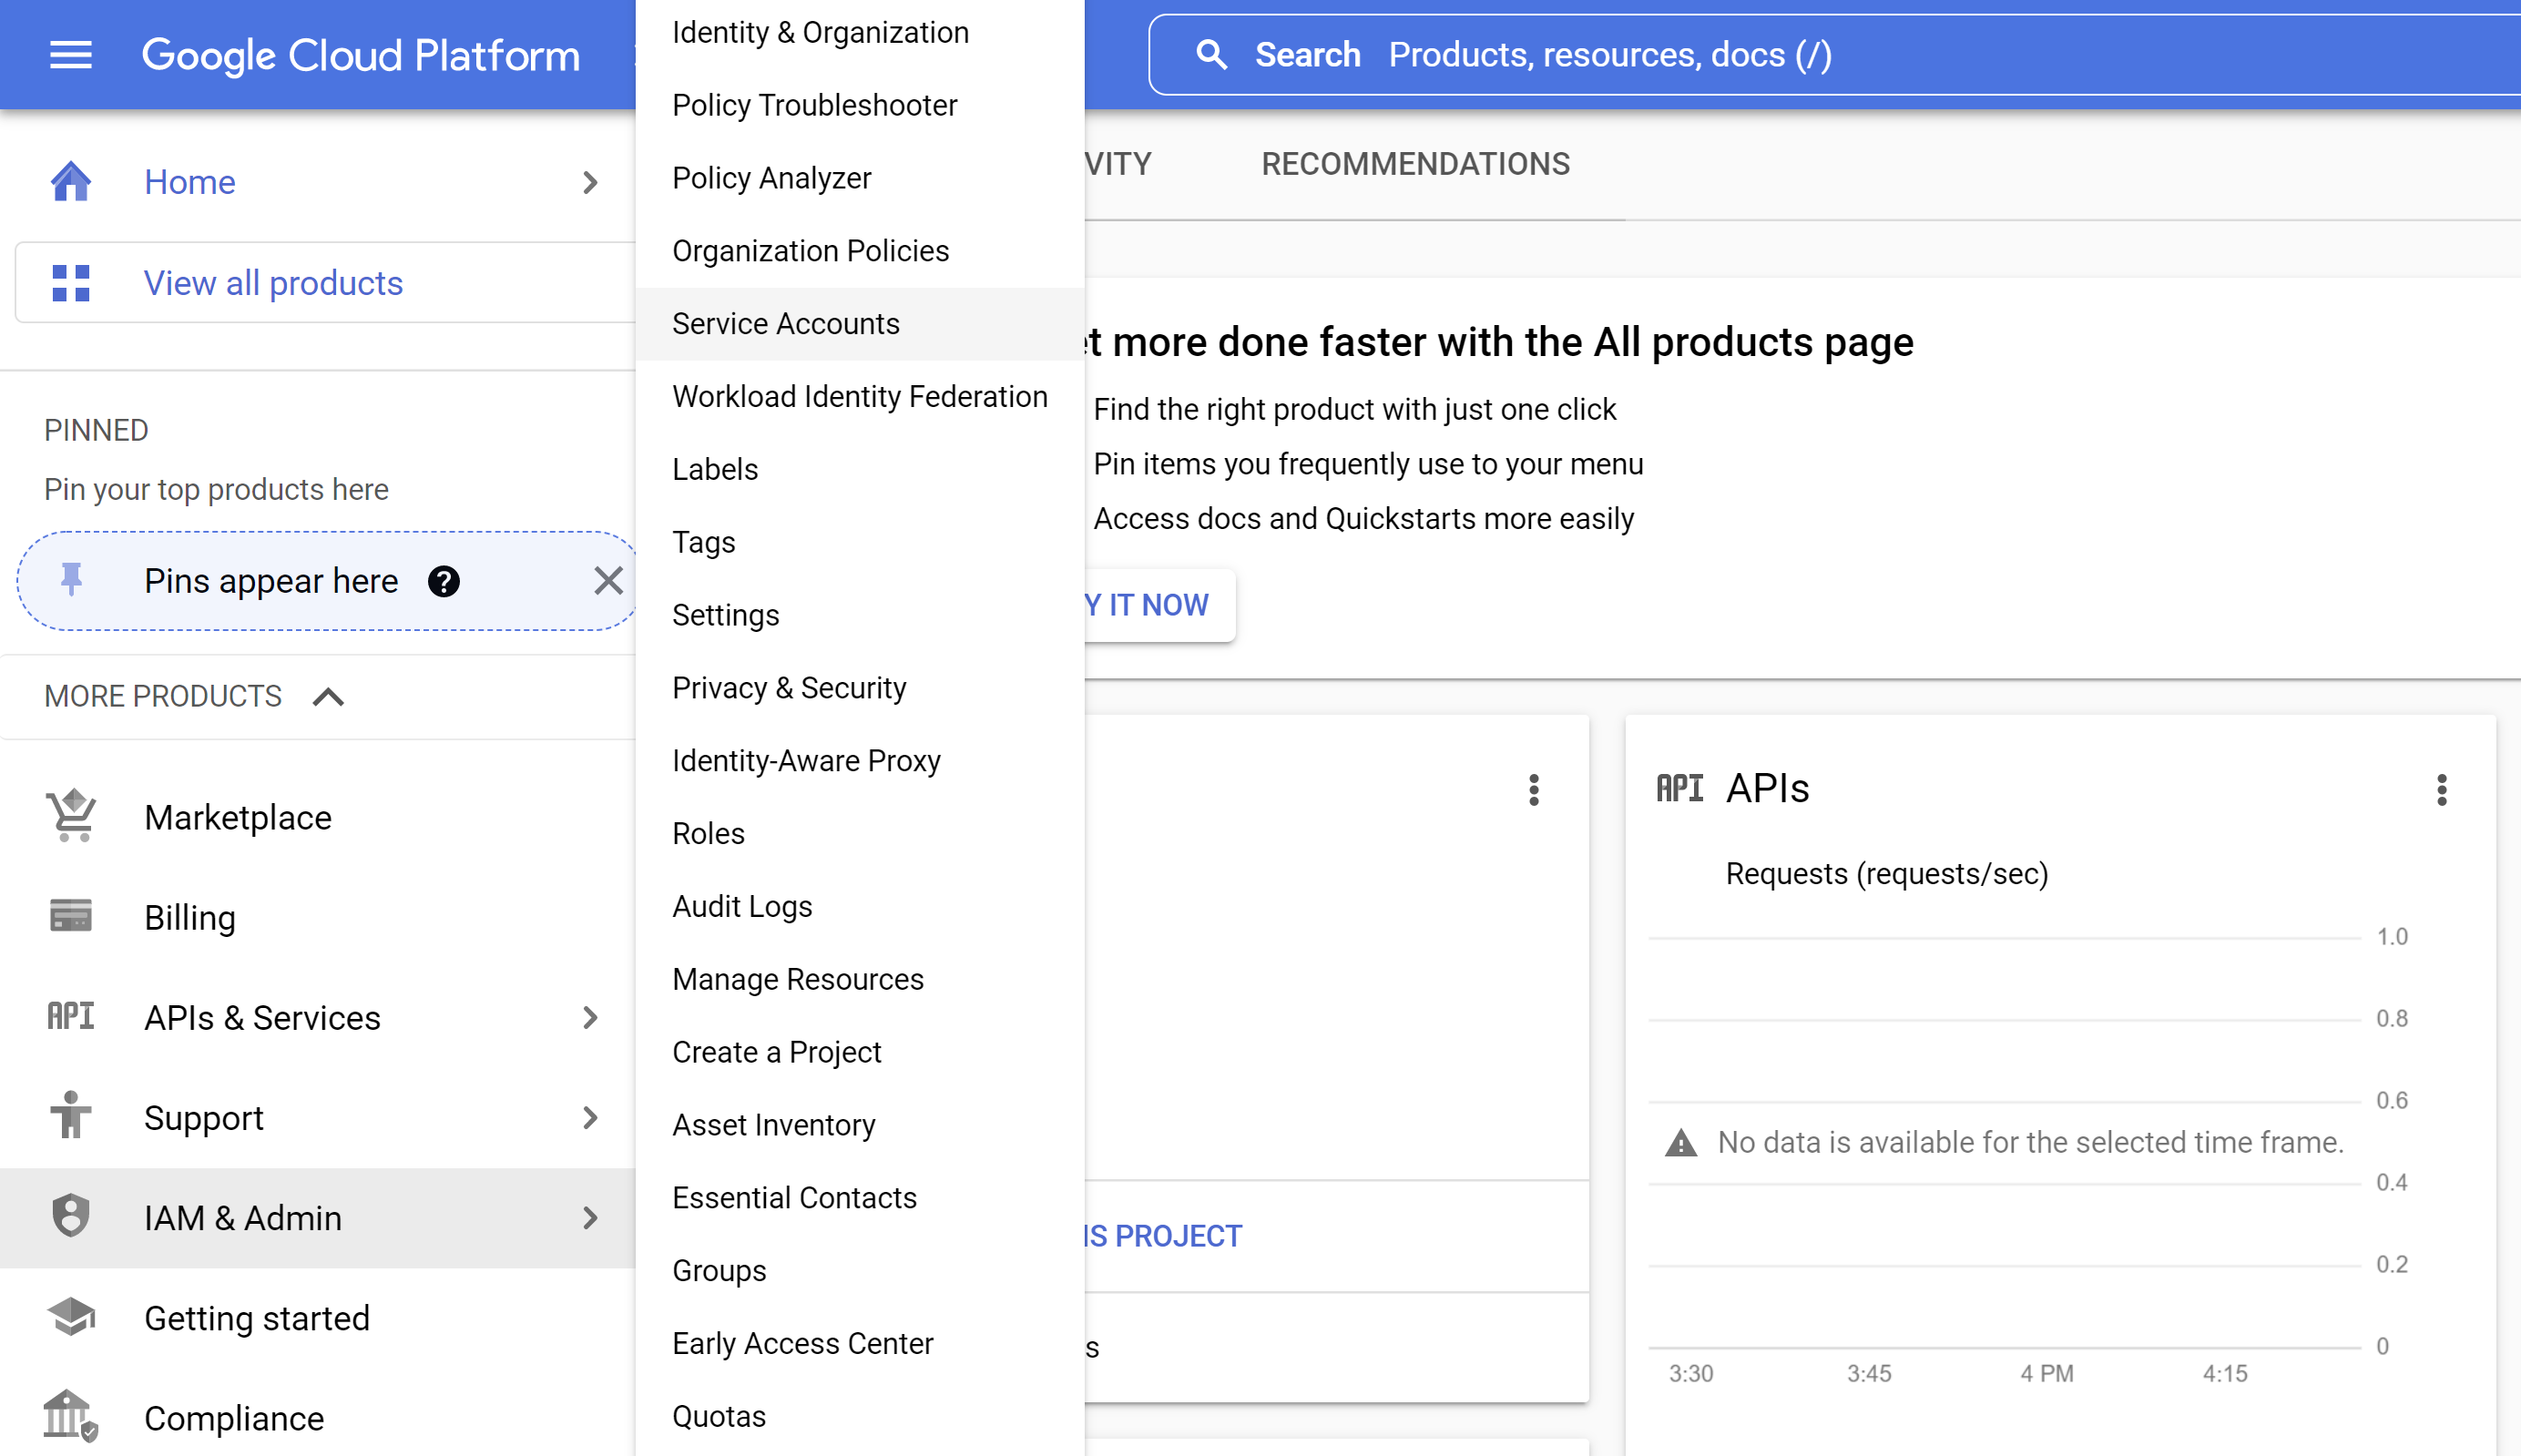
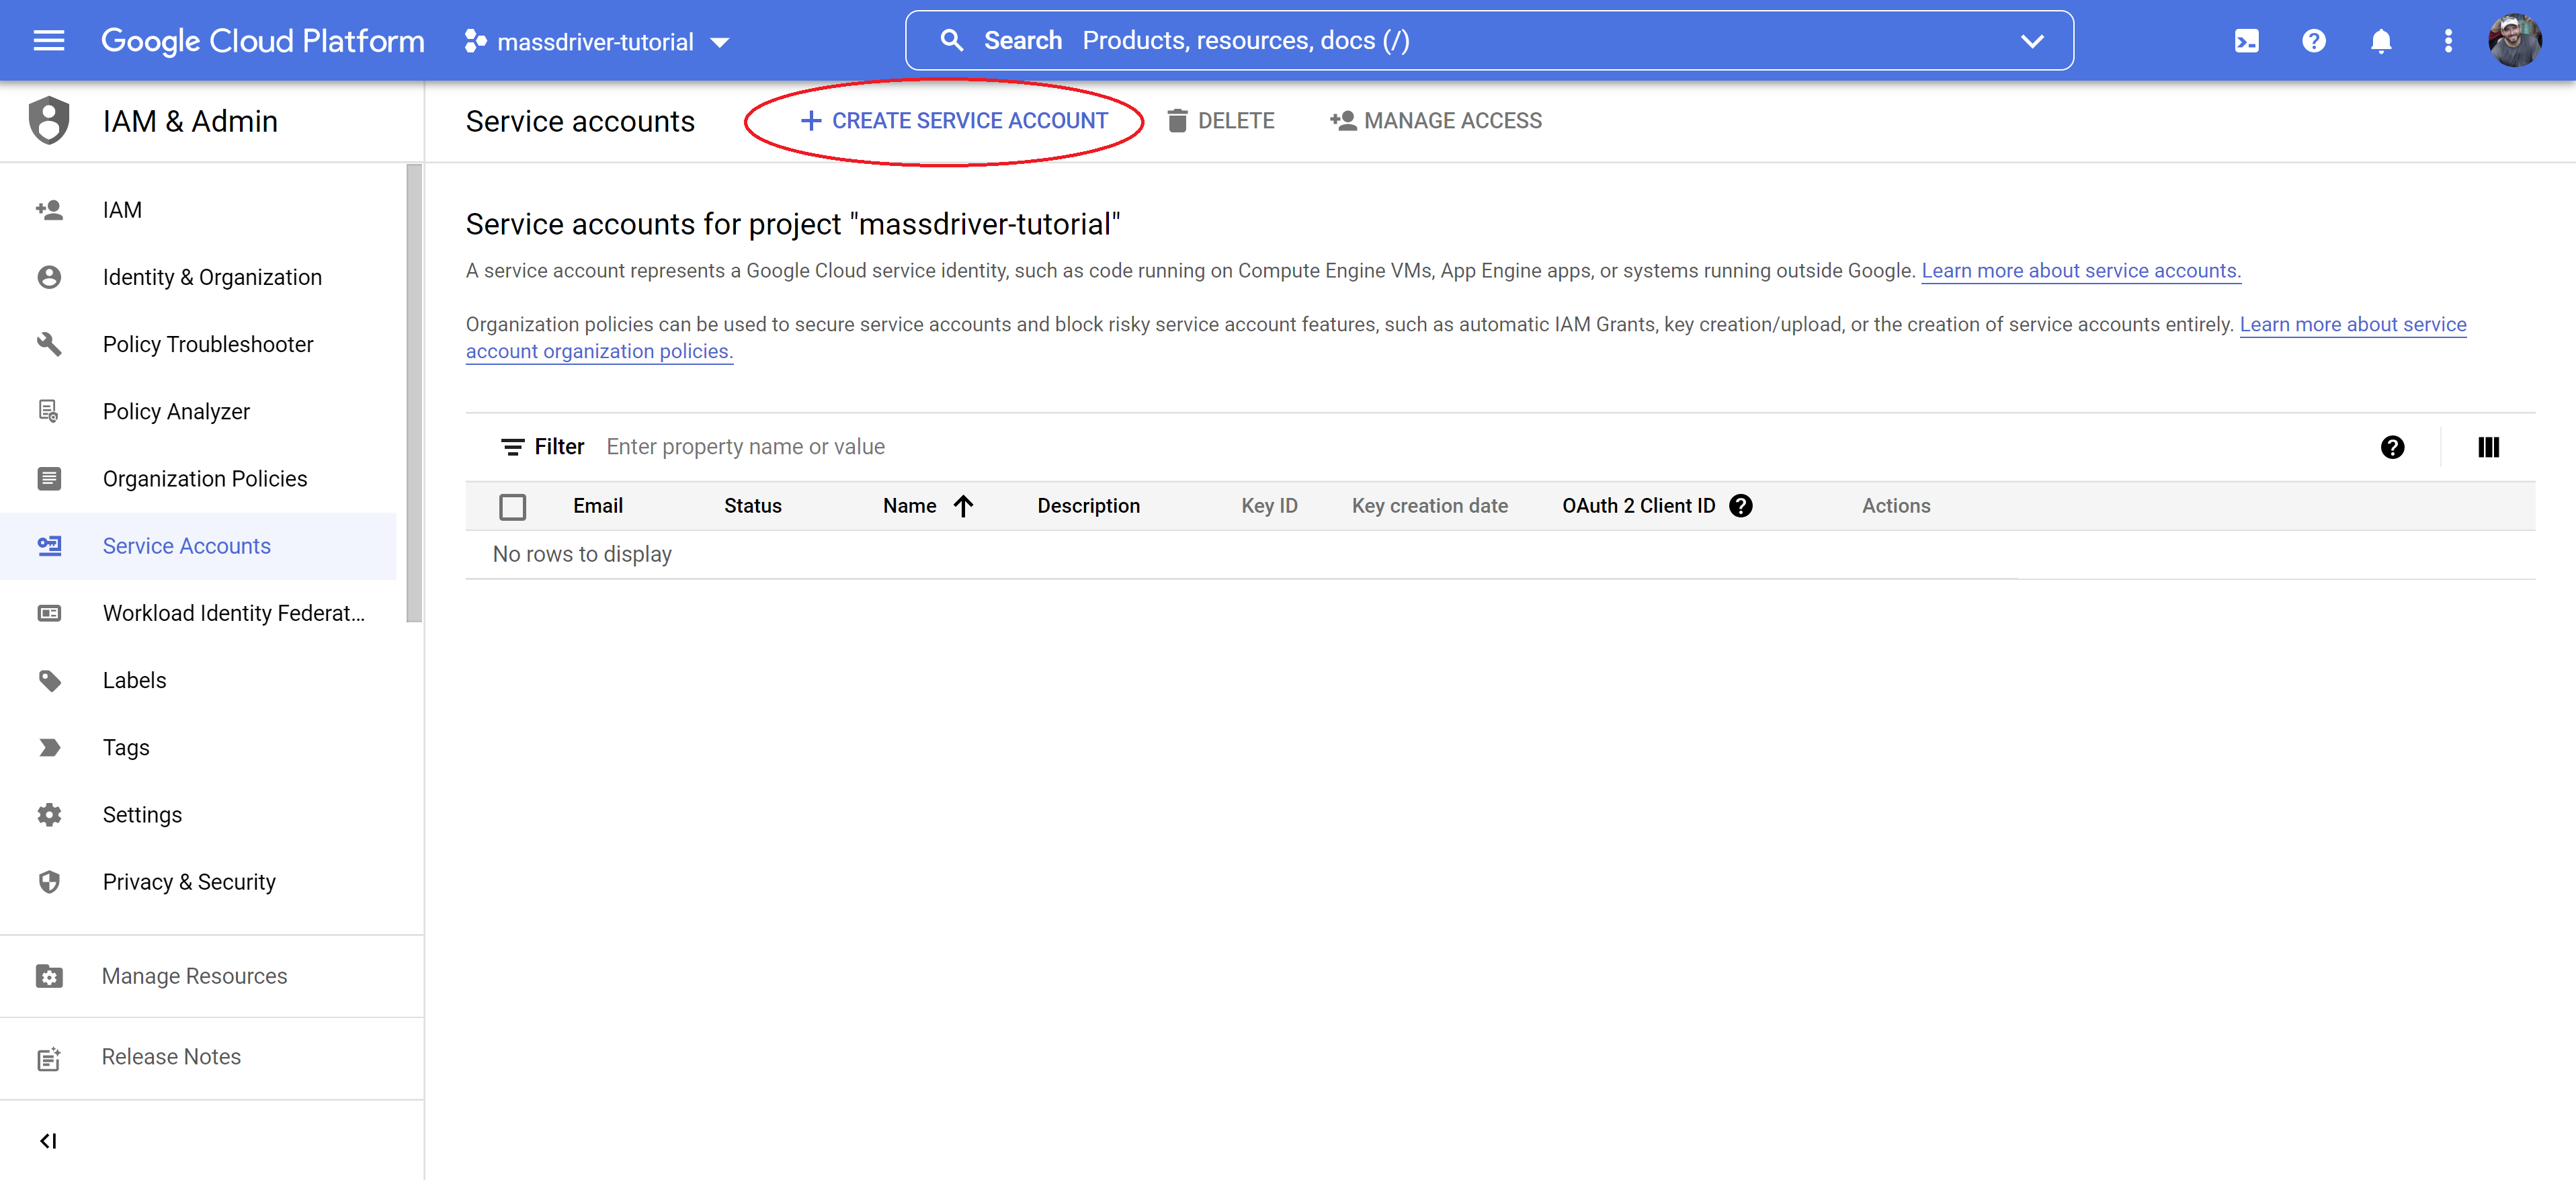
- Log in to the Google Cloud Console and navigate to the IAM/Service Accounts page.
- Click
Create service account
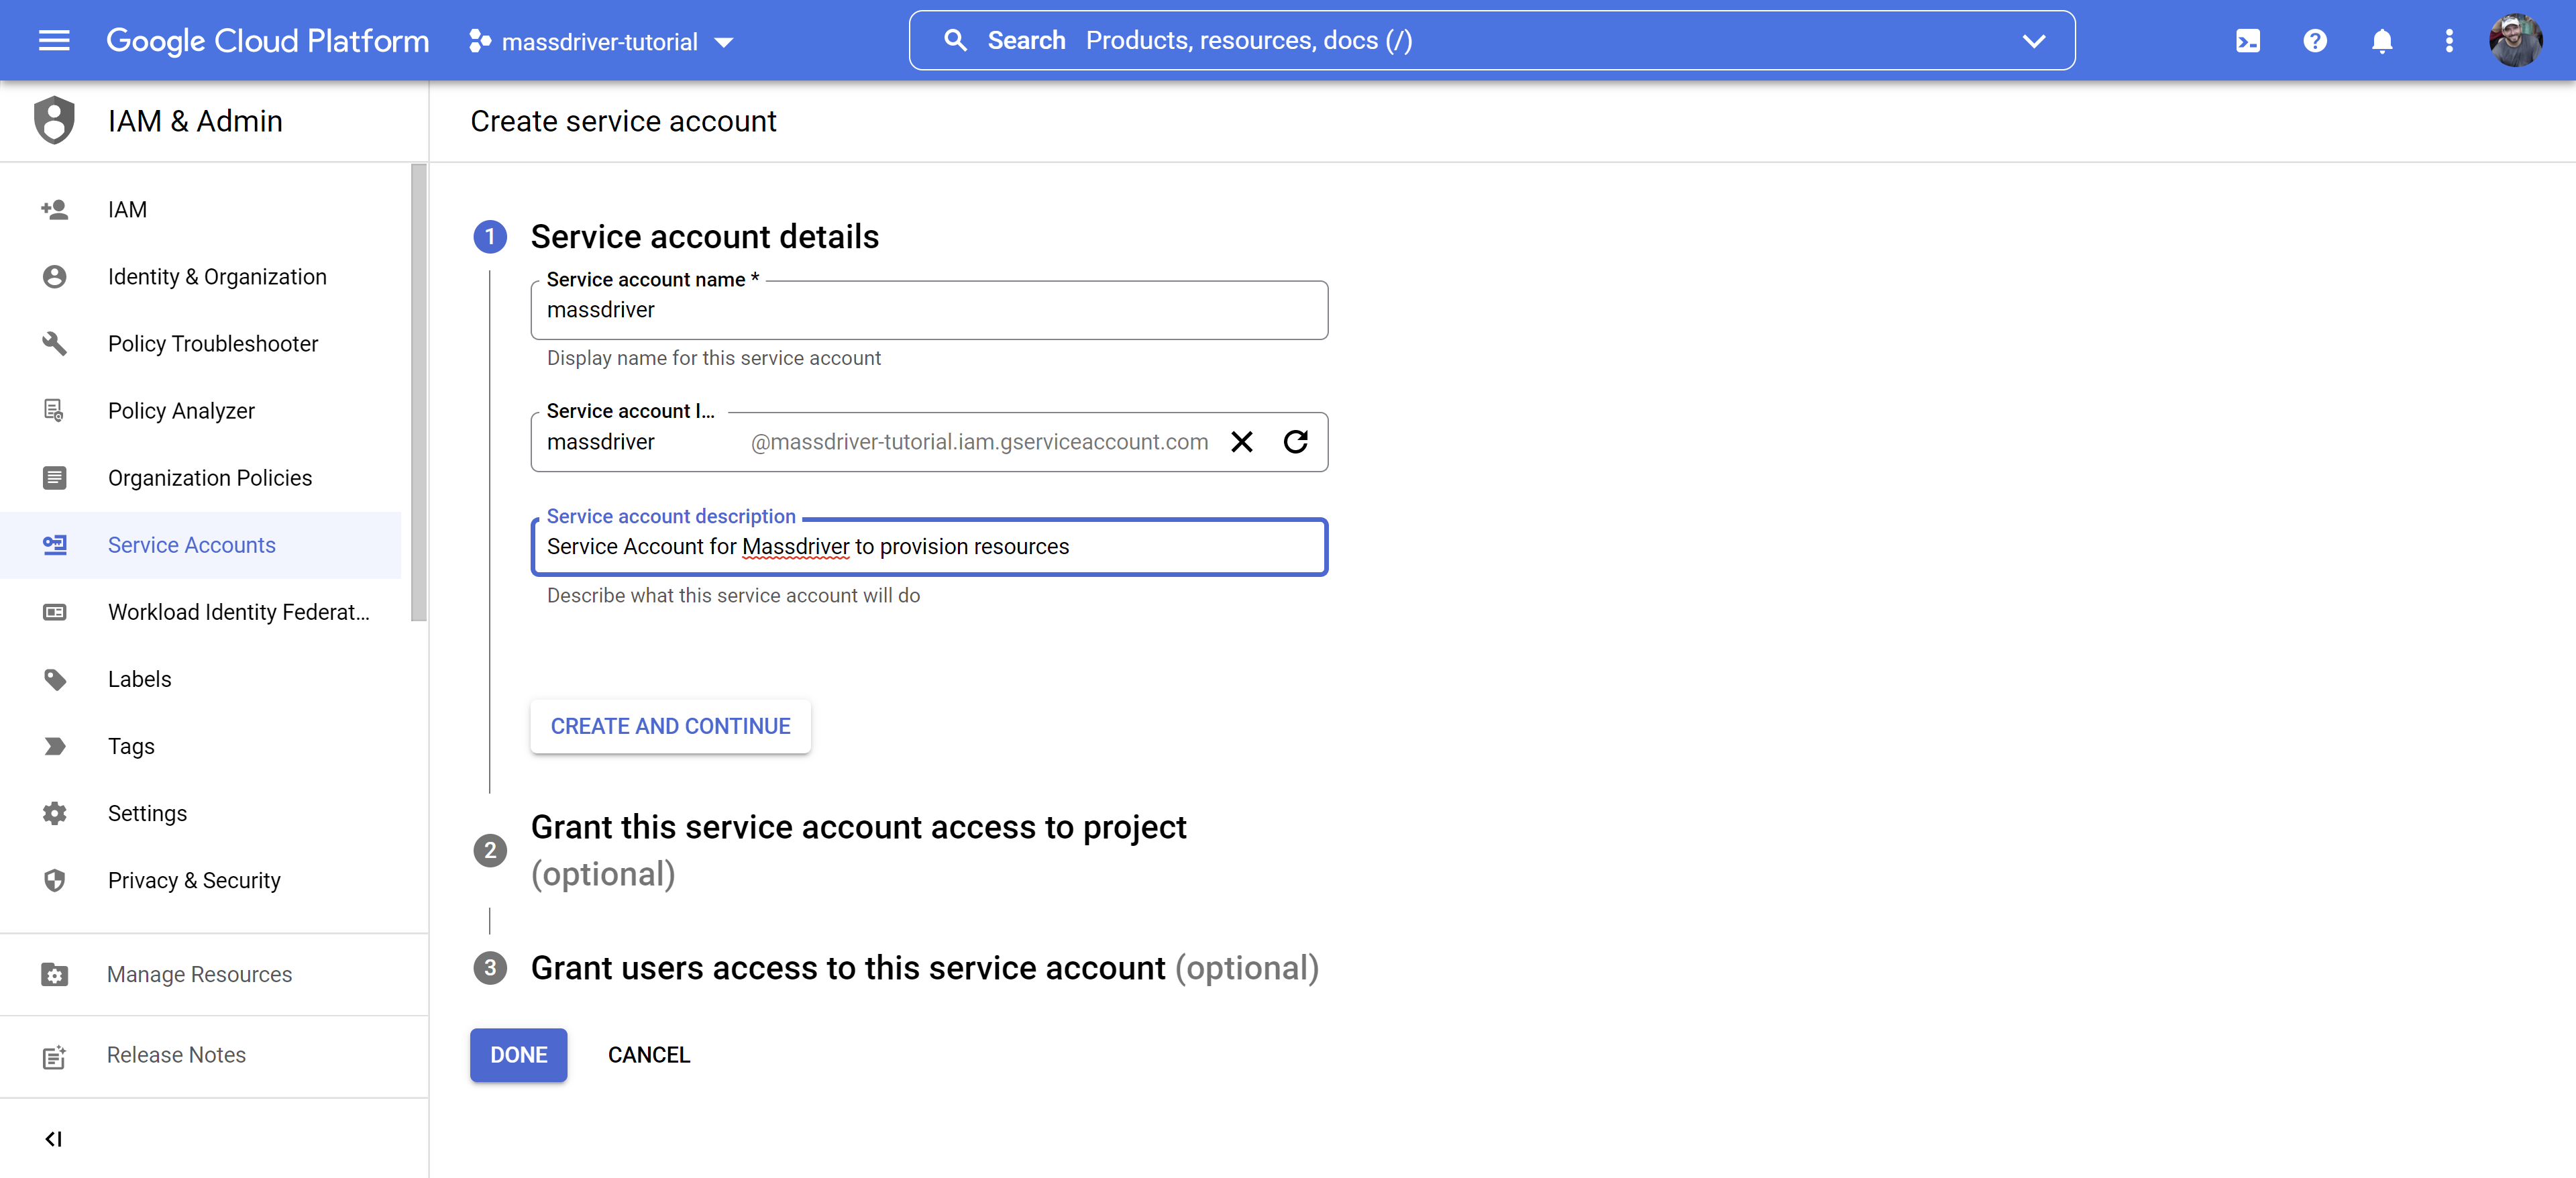
- Fill in the form with the following details:
- Service account name:
- Service account ID:
- Service account description: Massdriver Service Account (optional)
- Click
Create and Continue
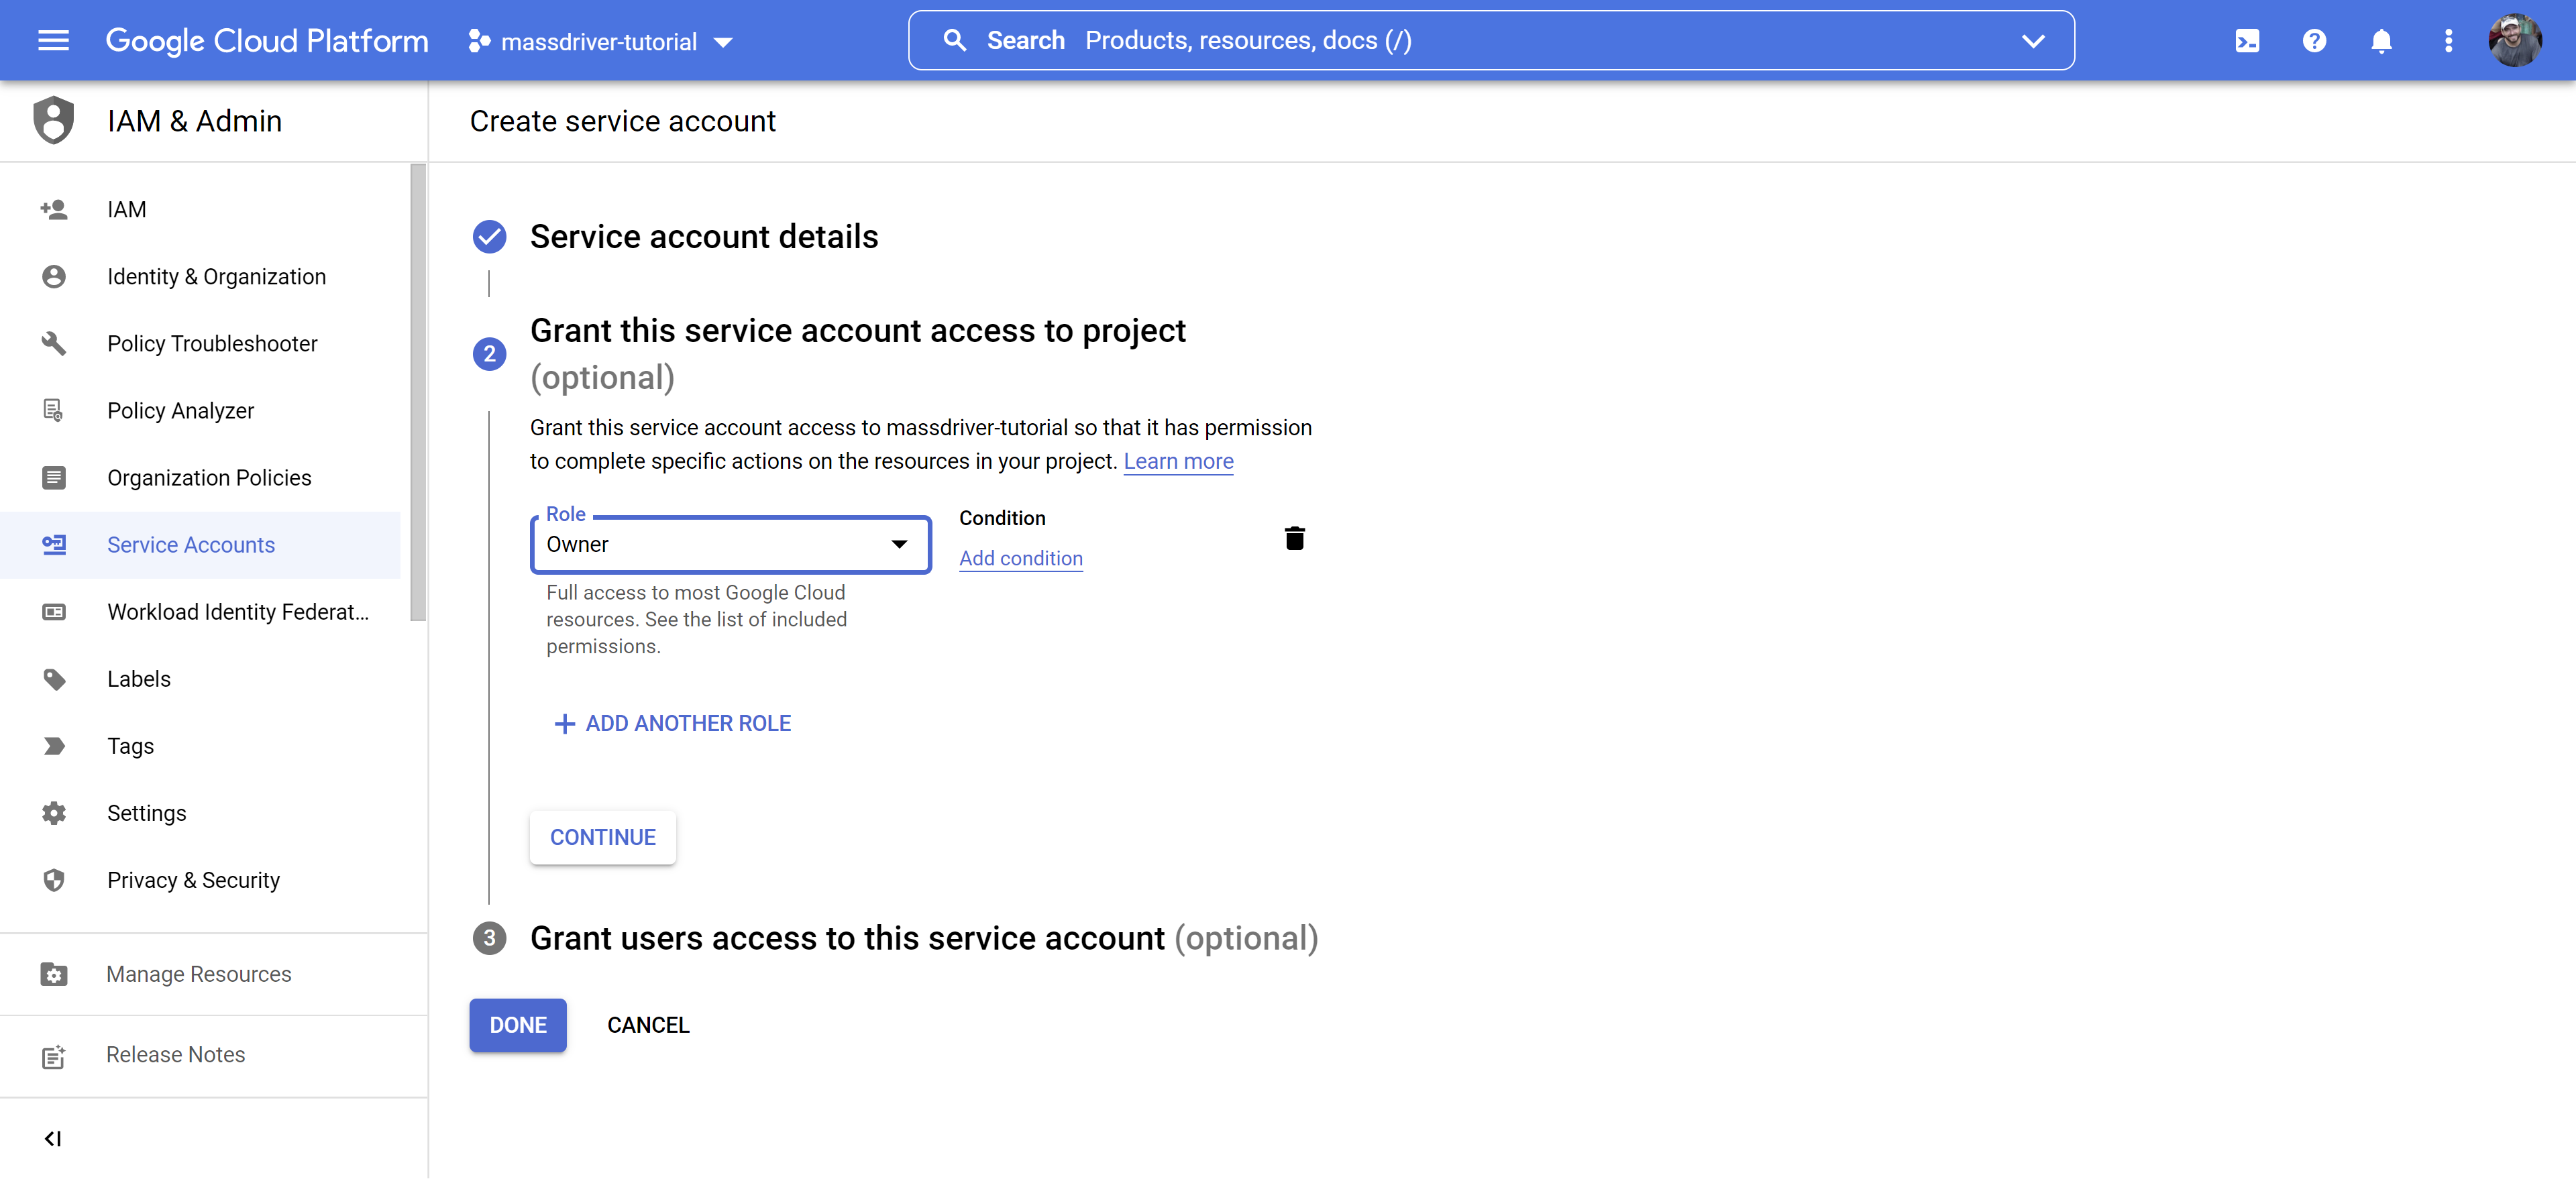
- Give your new service account
Ownerpermissions so Massdriver can manage your infrastructure - Click
Continue
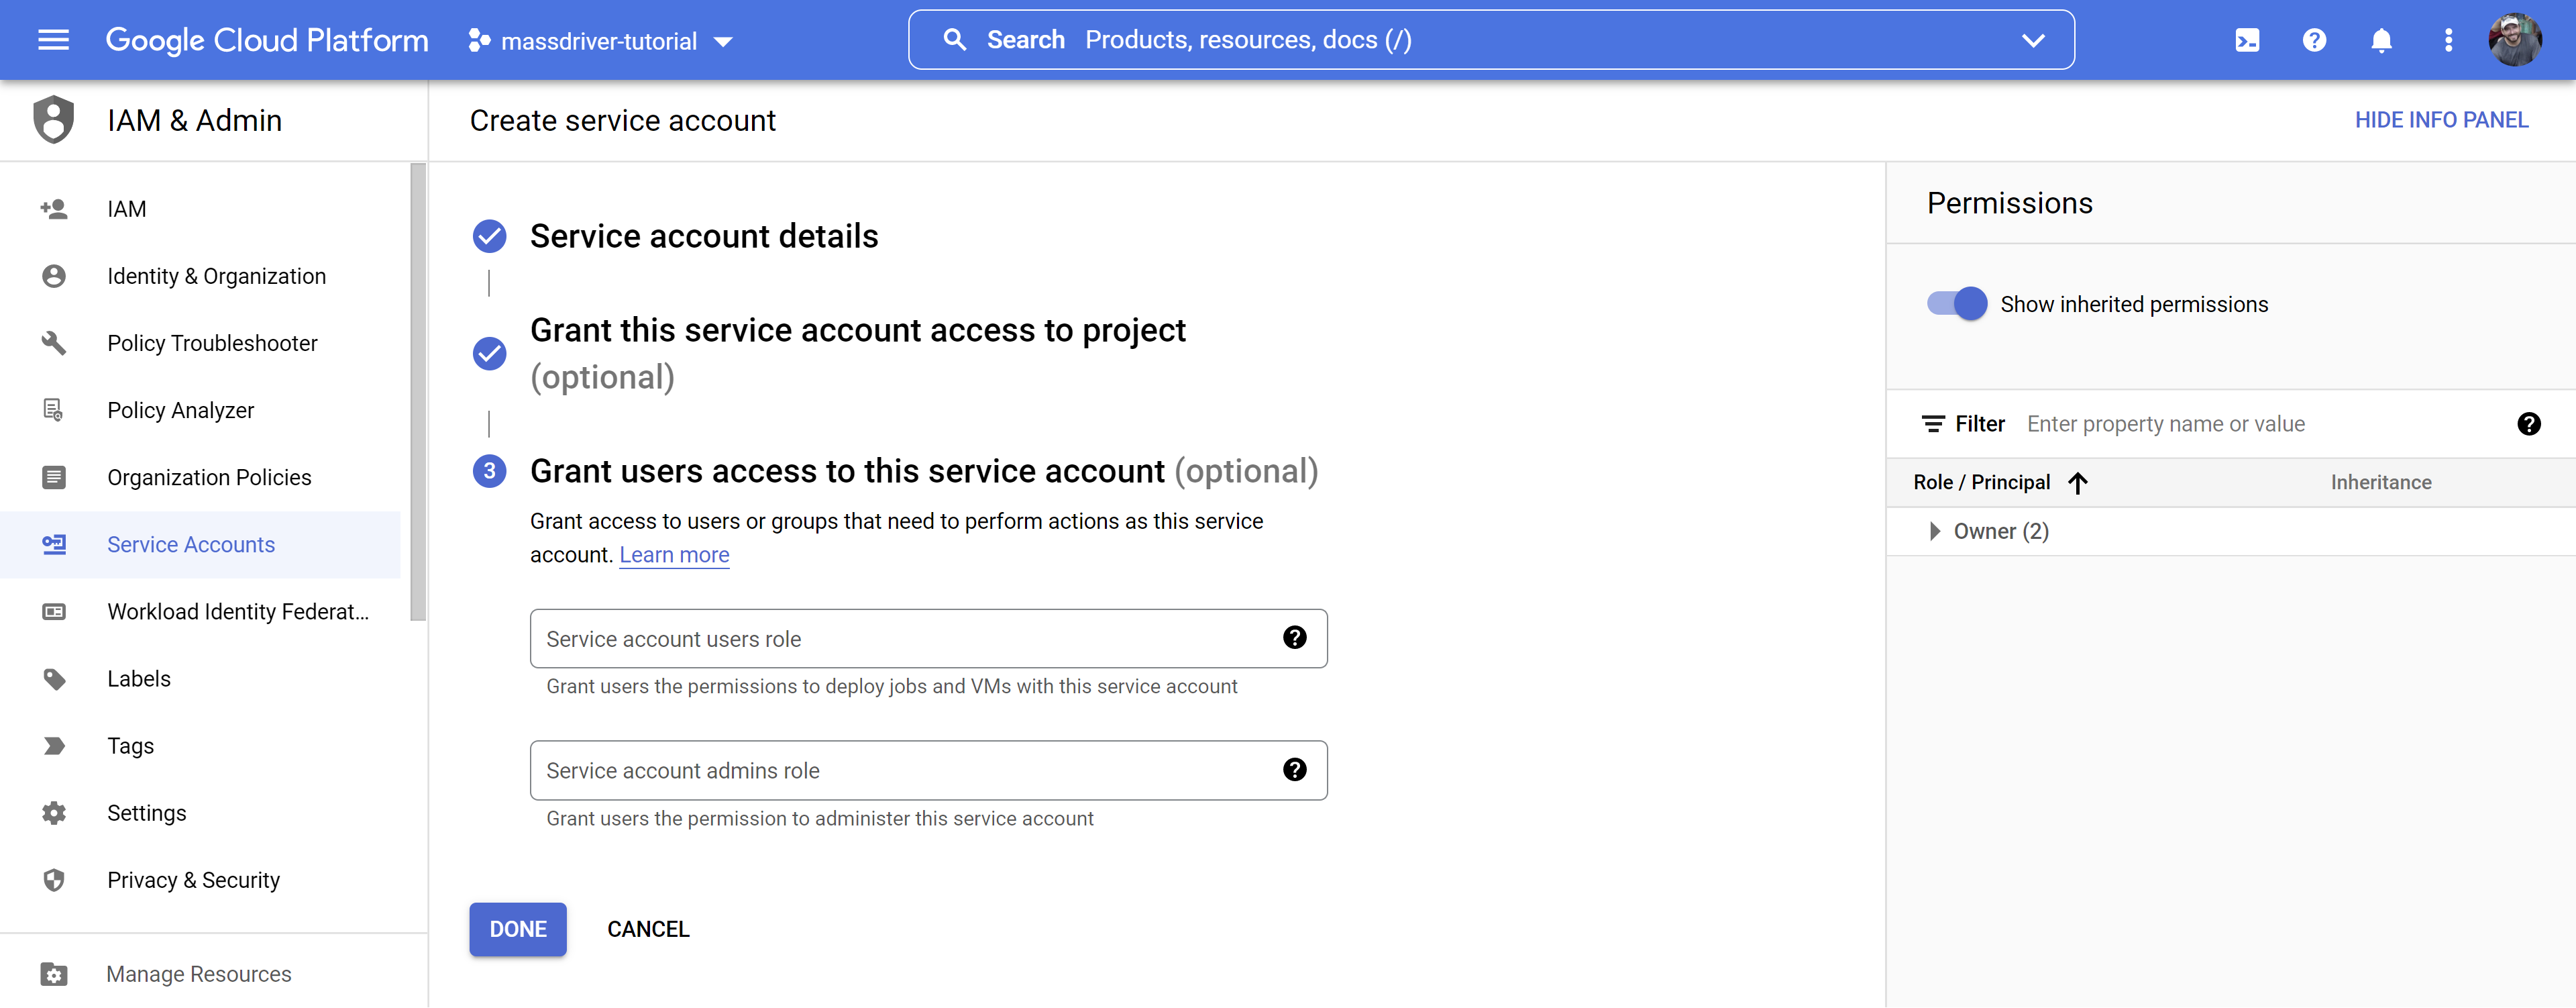
- Leave the grant users section blank. Click
Done
- Click the ID of the newly created service account
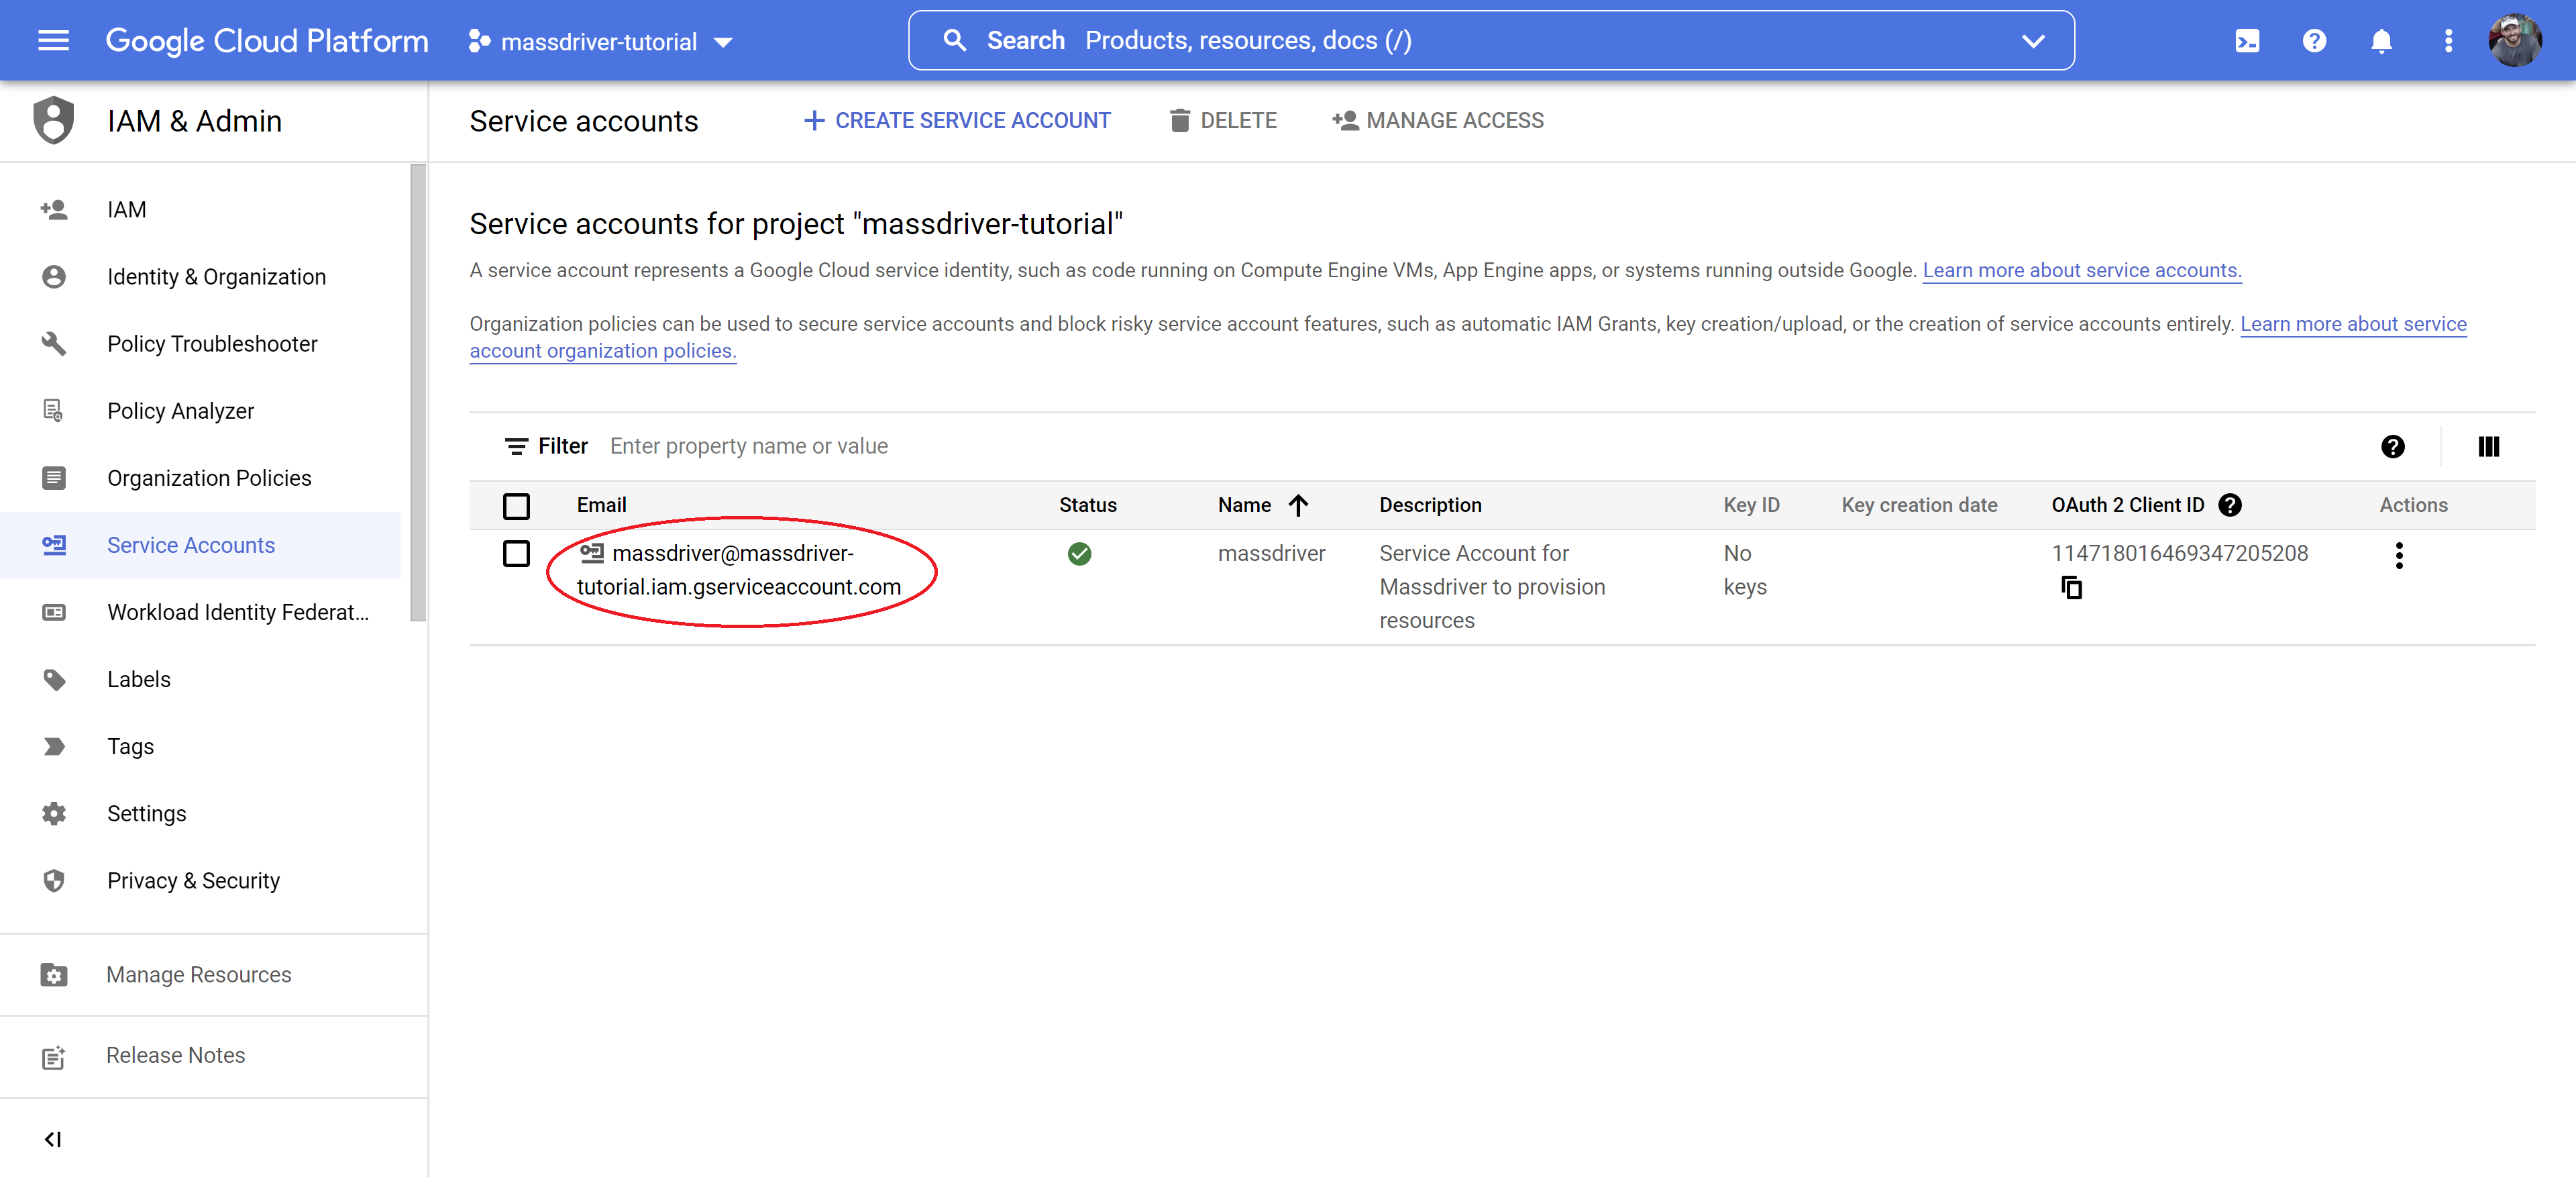
- Click the
Keystab - Using the add key dropdown, select
Create new key
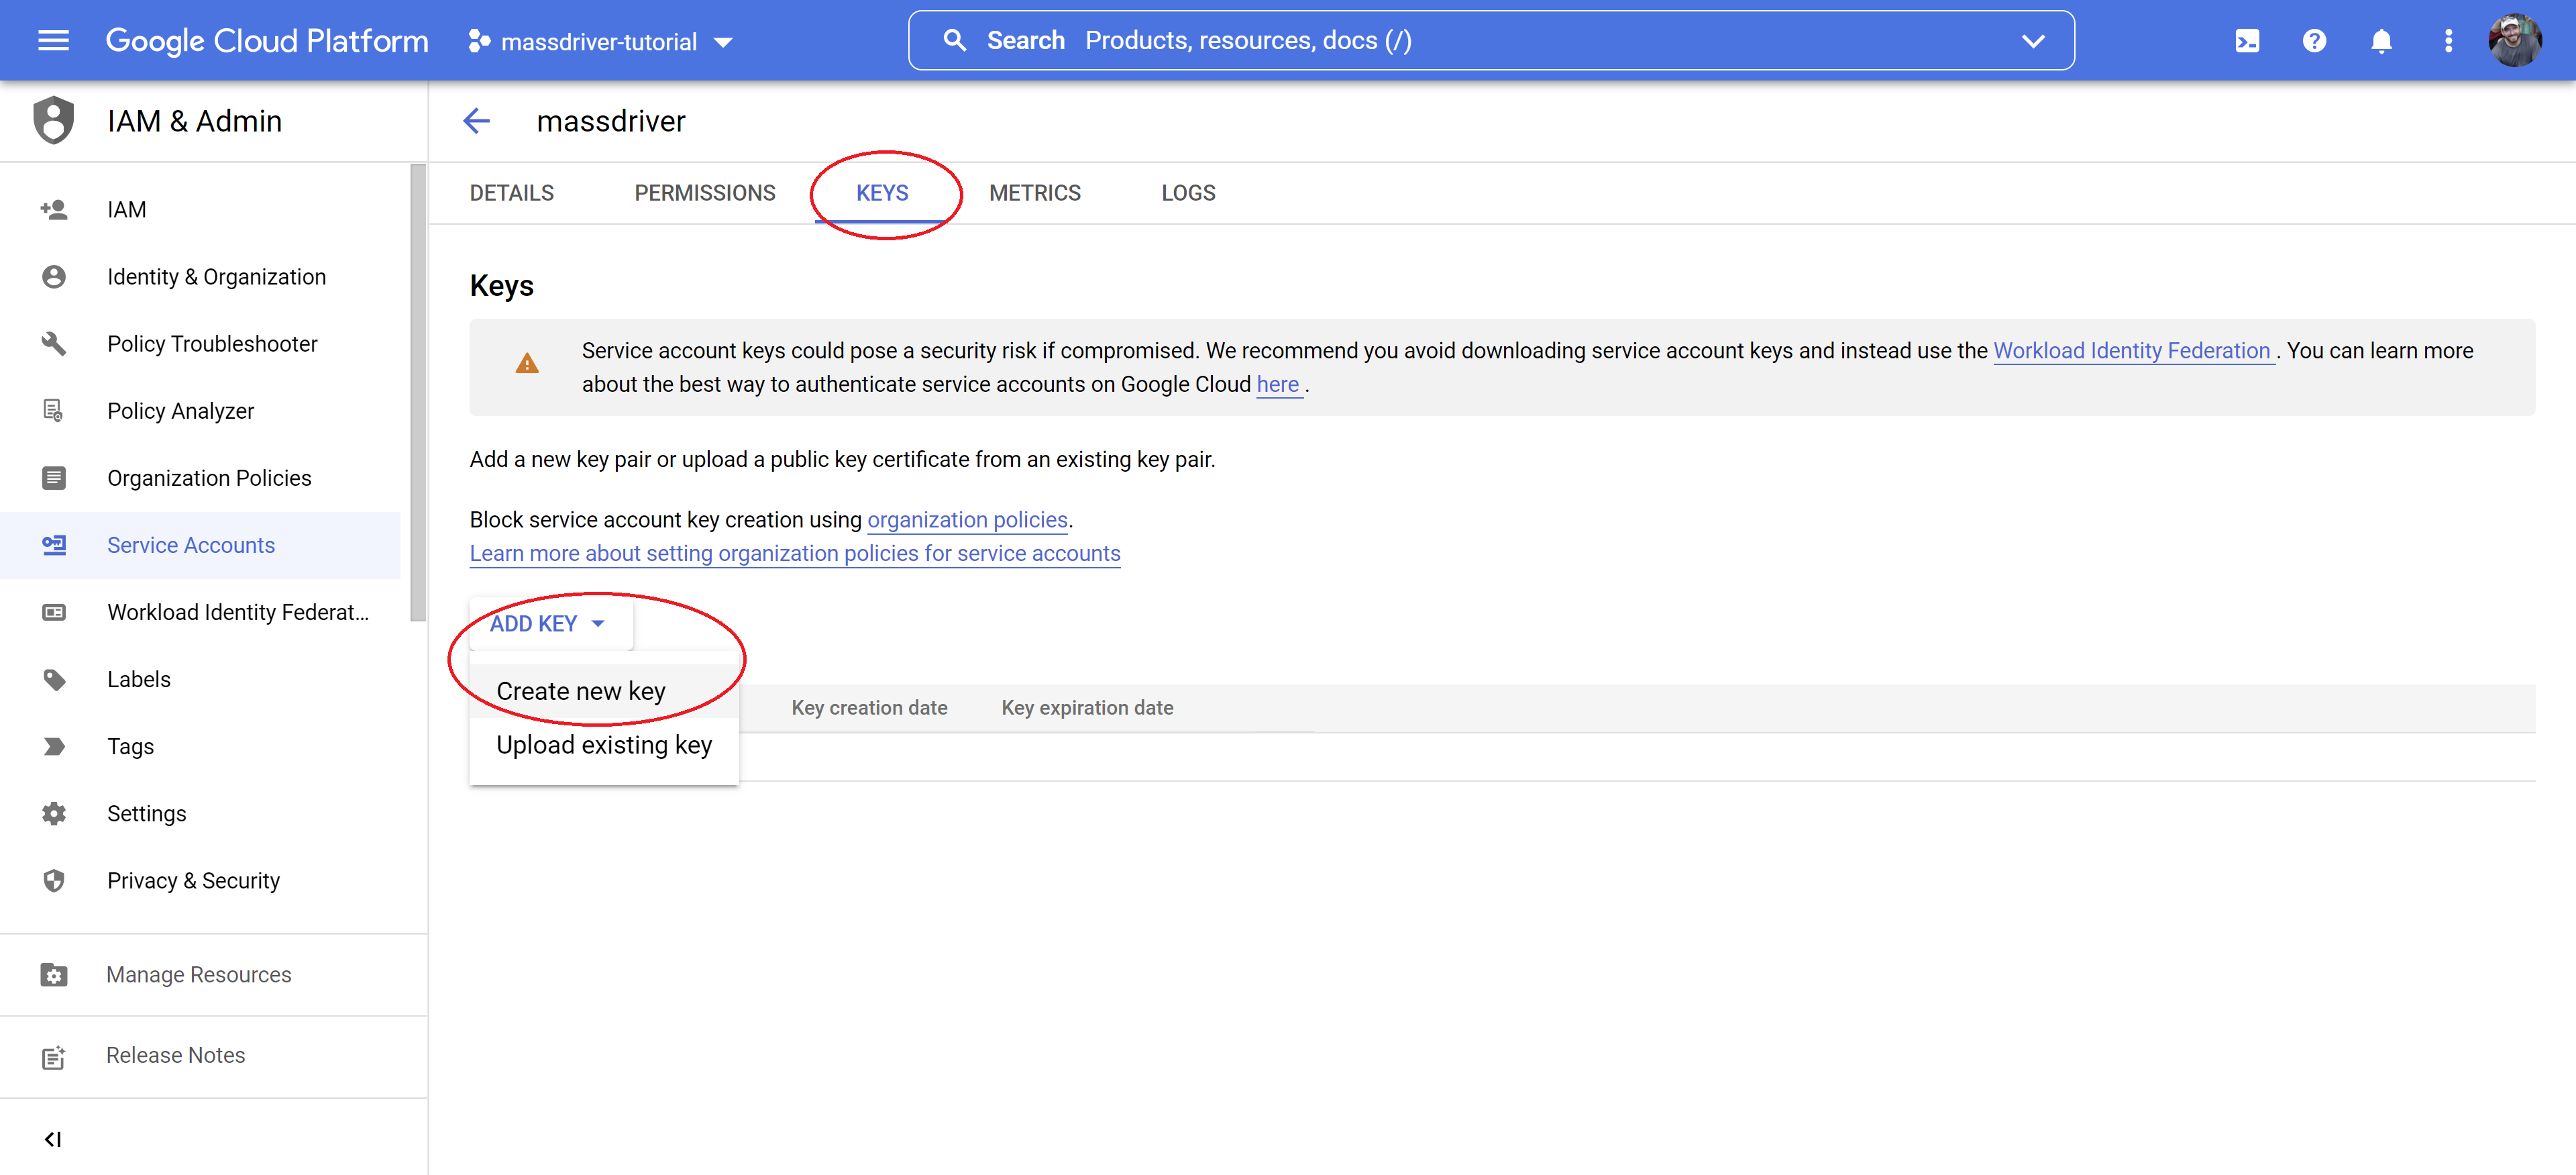
- Select
JSONand clickCreate

Attach the .json file created in the above step in to the Artifact Data field on the form.
Set the Credential Name to and click Create to add the credential to Massdriver. Head to the projects page to start building your infrastructure.